Hello dear fellow developers,
Maybe you have a nodejs application that you want to deploy on a cloud service?
So I advise you to look at Digital Ocean, a cloud provider that allows you to deploy easily, with a wide choice of architecture and system, but also a rich and clear management interface to manage your projects.
This tutorial will explain how to set up a basic linux server with user roles and security, as well as how to deploy your application in record time!
Why this tutorial?
I was given the opportunity to test their services, and despite the fact that the documentation provided is quite complete, I was unable to find an automatic cloud method at the time, which led me to create a script to manage the online launch of your nodejs application, manage server authentication via ssh, daemonize this application and manage dns.
First of all, create your nodejs application
Assuming that Node.js is already installed, use the express generator.
$ npm install express-generator -g
Now generate the app
$ express myapp
You can see all the options with this command
$ express -h
Usage: express [options][dir]
Options:
    -h, --help          output usage information
        --version       output the version number
    -e, --ejs           add ejs engine support
        --hbs           add handlebars engine support
        --pug           add pug engine support
    -H, --hogan         add hogan.js engine support
        --no-view       generate without view engine
    -v, --view <engine> add view <engine> support (ejs|hbs|hjs|jade|pug|twig|vash) (defaults to jade)
    -c, --css <engine>  add stylesheet <engine> support (less|stylus|compass|sass) (defaults to plain css)
        --git           add .gitignore
    -f, --force         force on non-empty directory
Install the dependencies
$ cd myapp
$ npm install
You can launch your nodejs app like that and access it at http://localhost:3000
$ npm start
And that’s it!
Add a new ssh key
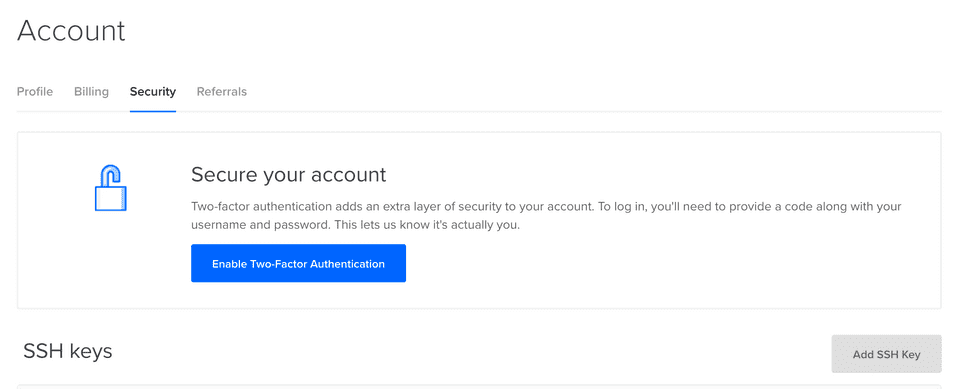
On your dashboard, in the left menu click on ACCOUNT and then Security.
Then click on Add SSH Key and follow the tutorial.
Create the project
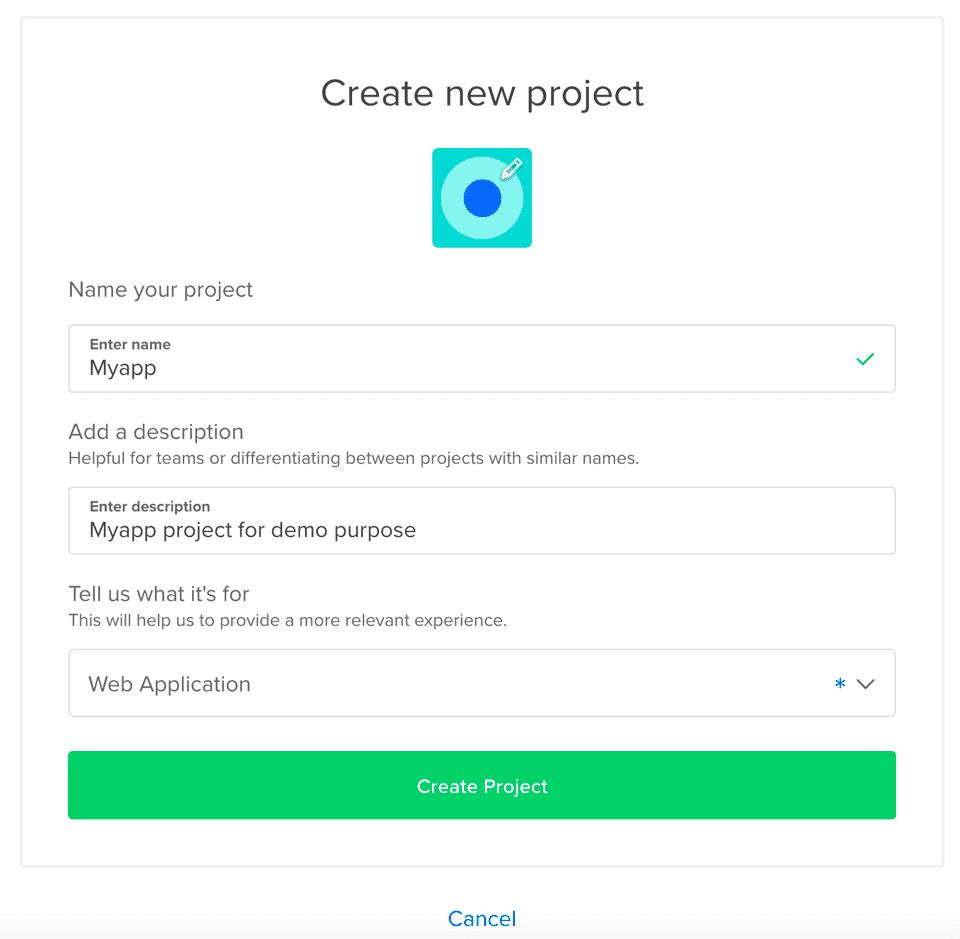
On your dashboard, click on + New Project in the left menu.
On the new form, you just have to fill the project name, the description and select a purpose.
On the second step, you can just click on skip for now.
Create the droplet
In your project dashboard, click on Get Started with a Droplet button.
I suggest you to choose theses options :
- Ubuntu OS.
- Standard plan at 5$/mo.
- A datacenter depending on your region.
- SSH Keys authentification with your newly added ssh key.
- In Select additional options select User data
When you choose User data as an option, Digital Ocean allow to use a cloud script to generate your new droplet.
I created a little script that allow to generate users, manage ssh keys, daemonize your app and other few things. Check it here https://github.com/bloodbee/cloud-config-scripts-digitalocean/blob/master/webserver/nodejs-app.yml.
You can just copy/paste the script and replace keywords <%...%> with your own value.
For <%DIGITAL_OCEAN_API_KEY%>, use a new one generated in MANAGE then API.
For <%SSH_PUB_KEY%>, this is the one you added previously in your account ssh keys.
For <%REPOSITORY_GIT_TO_USE%>, its the url of the git repository you use to version your project (It can be github, gitlab, bitbucket or whatever you prefer to use).
When everything seems good, you can click on Create Droplet button.
Manage your Networking
On your dashboard, click on MANAGE and then Networking.
Enter your domain, choose the right project and click on Add Domain.
Then you need to update your dns with you domain name registrar. Check it here on how do that.
Personally, I love to use OVH for my domain names. So in our case we add two new **A records **(myapp.com and www.myapp.com) that will redirect to our newly created droplet. Don’t forget to select the good one!
After all those steps, your web app should be alive on a droplet, and you can access to it directly.
What’s next ?
This guide should take approximately 30mins to be completed. On your next nodejs deployment, it will be quicker because of the already added ssh keys.
From now, you can program your web app, connect by ssh to your droplet, and put together some CI/CD pipelines.
Leave a comment in the disqus area if this guide helped you. :)
See you for an other one.


